
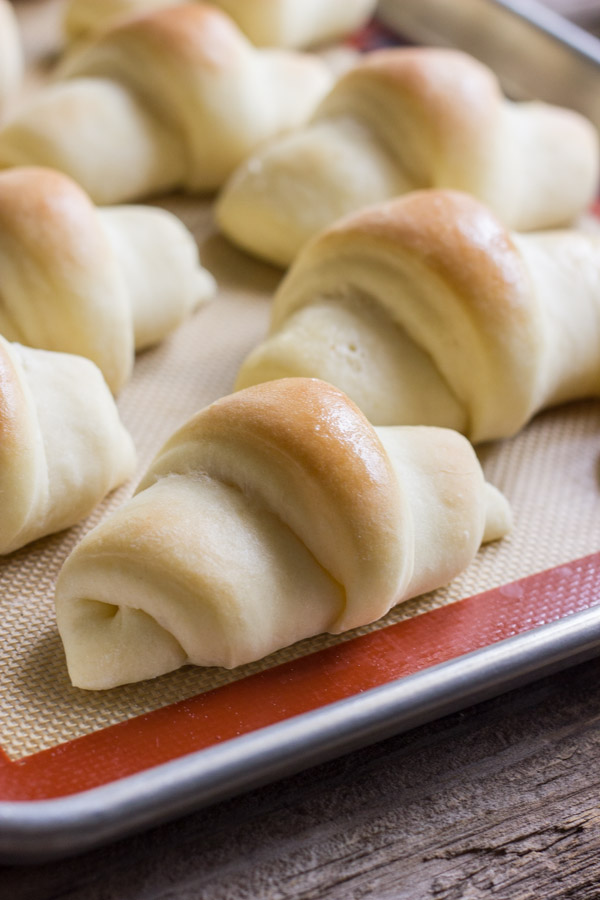
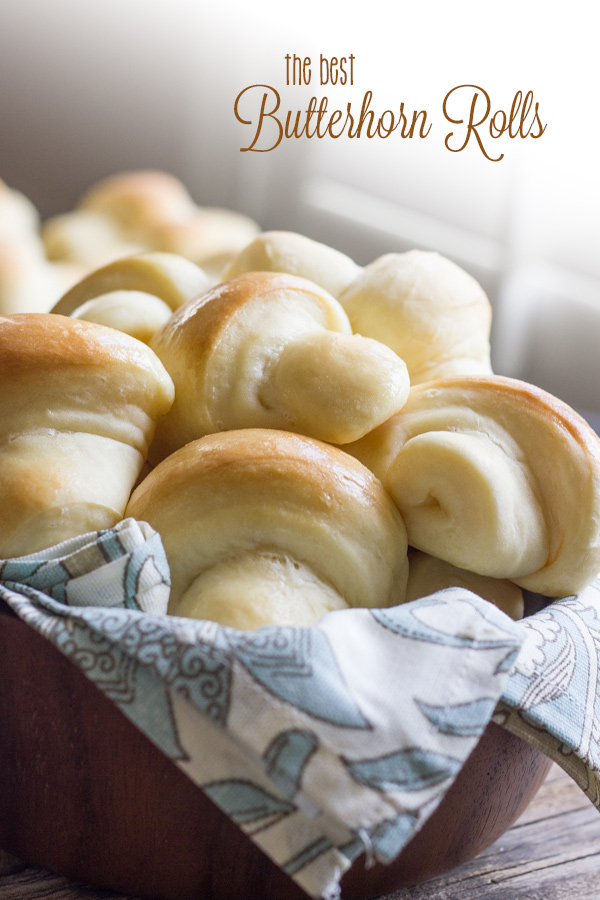
My family calls these “Julie Rolls”. In the summer of 1995, I found the recipe in a Taste of Home magazine that my mom subscribed to. Since making them for the first time when I was 15 years old, I would estimate I’ve made them at least fifty times. My extended family gathers together for big dinners quite a bit, and when I bring these rolls, they make me feel like I’m their hero. They make quite a fuss over them, and if I’m being honest, I never get tired of the compliments!
They are not hard to make, in fact, you probably have all the ingredients on hand, and the only tools you need are a big bowl, wooden spoon, rolling pin and pizza cutter. I’ve never used an electric mixer, and I think this is why they are so incredibly tender. The secret to making these rolls turn out just right are to have your ingredients at the right temperature, and to get to know what the dough should feel like when it’s right.
I don’t usually try to capture each step involved in my recipes, but this time I was careful to show you more of the process. I really want you to make these rolls, fall in love with them, and be a hero to whomever you share them with!
This recipe requires that the dough be refrigerated for at least 6 hours before you roll it out. This is what it will look like all puffed up when you take it out of the fridge.
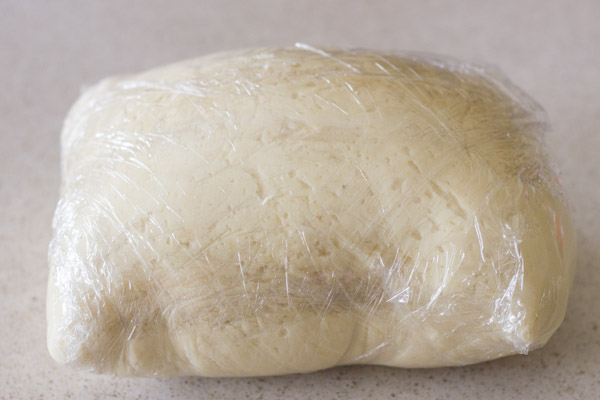
Then you punch it down and divide it into two equal parts.
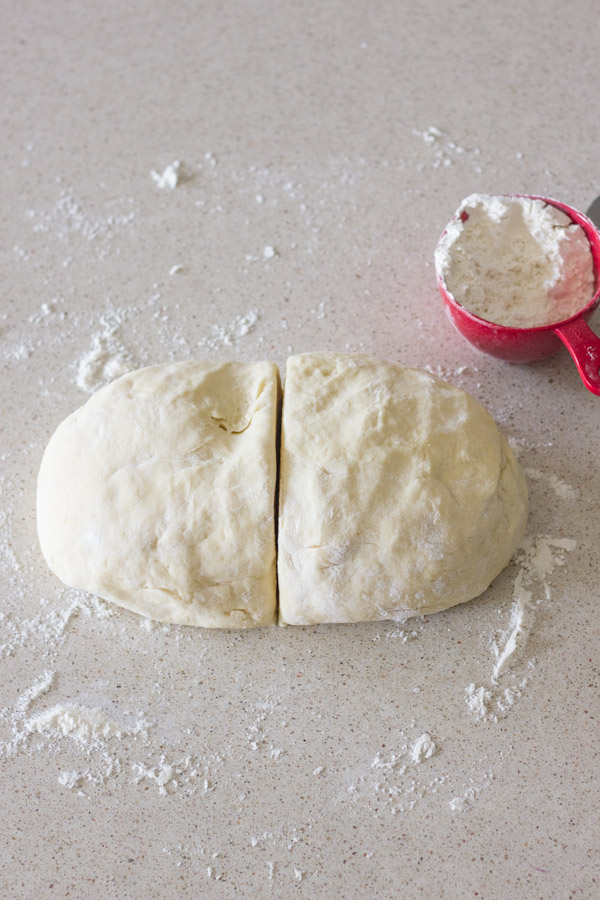
Dust your work surface and the top of the dough with a good bit of flour. So frustrating when your dough sticks! Take one half of your dough, shape it into a round disk, and then roll it out into a 12 inch circle.
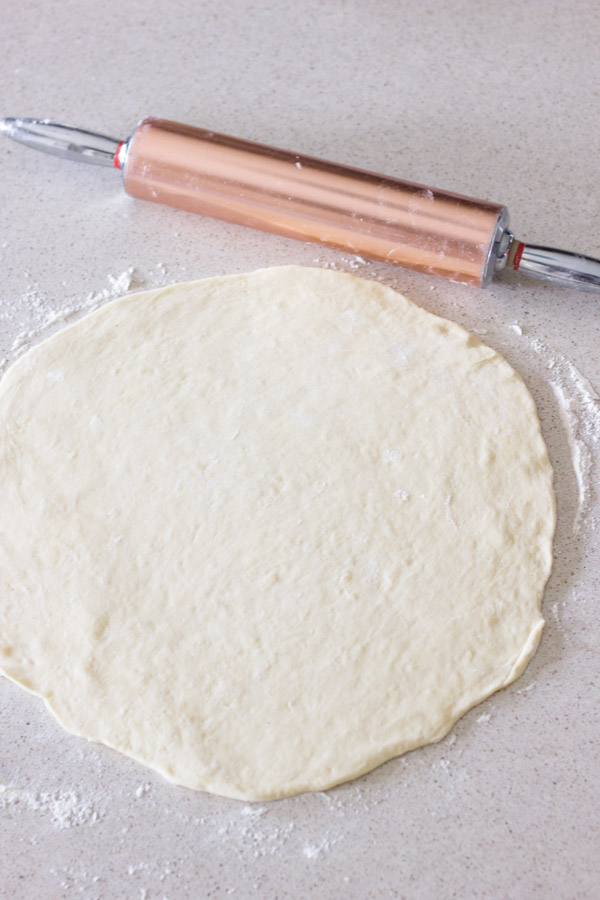
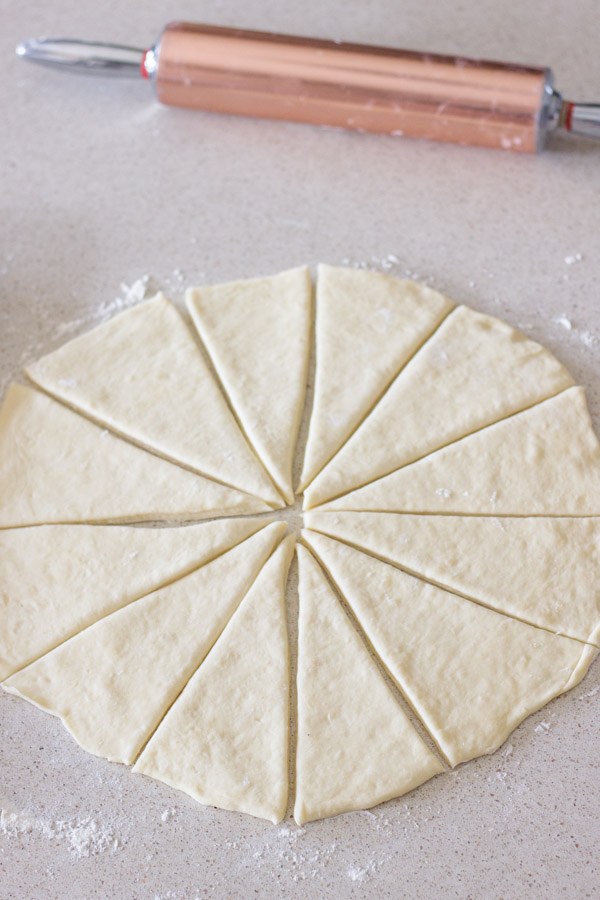
Cut the circle into four quarters, and then each quarter into three wedges. A pizza cutter is perfect for this.
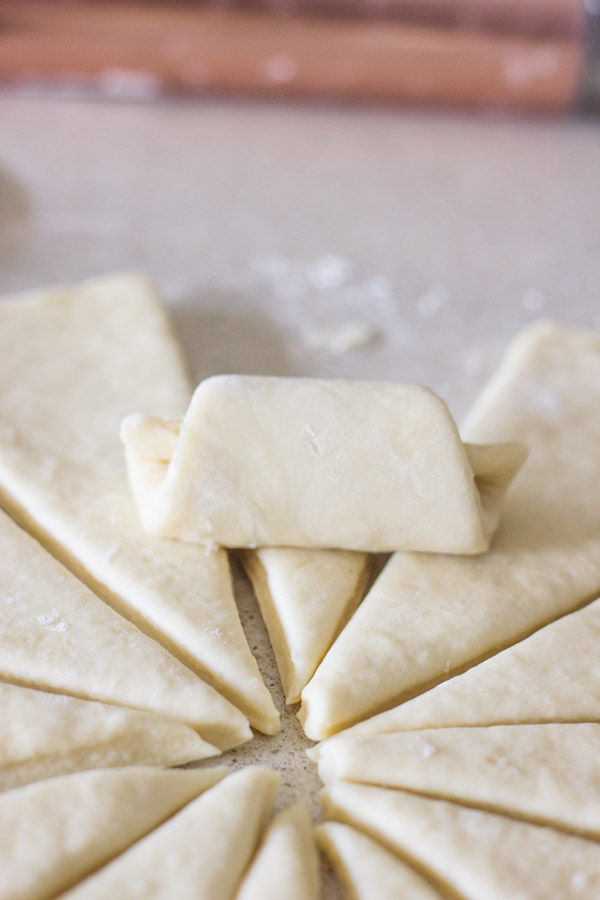
Starting with the wide end of the wedge, roll it up toward the point.
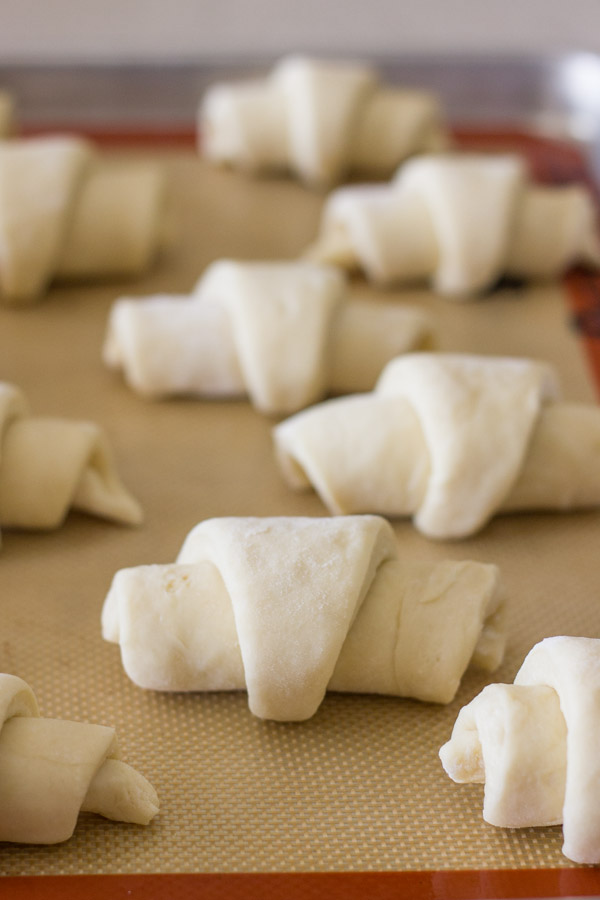
Place them on a baking sheet with the point tucked underneath. Repeat this process with the other half of the dough, and then cover both baking sheets with a clean dish towel, and let the dough rise for one hour.
Preheat your oven to 350 degrees, and bake them for 12-15 minutes. The tops will be golden brown.
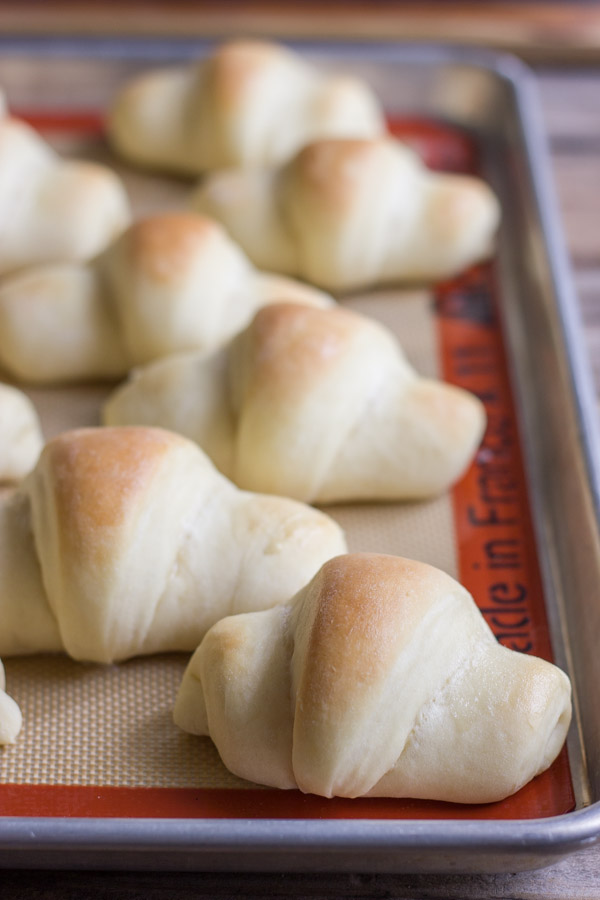
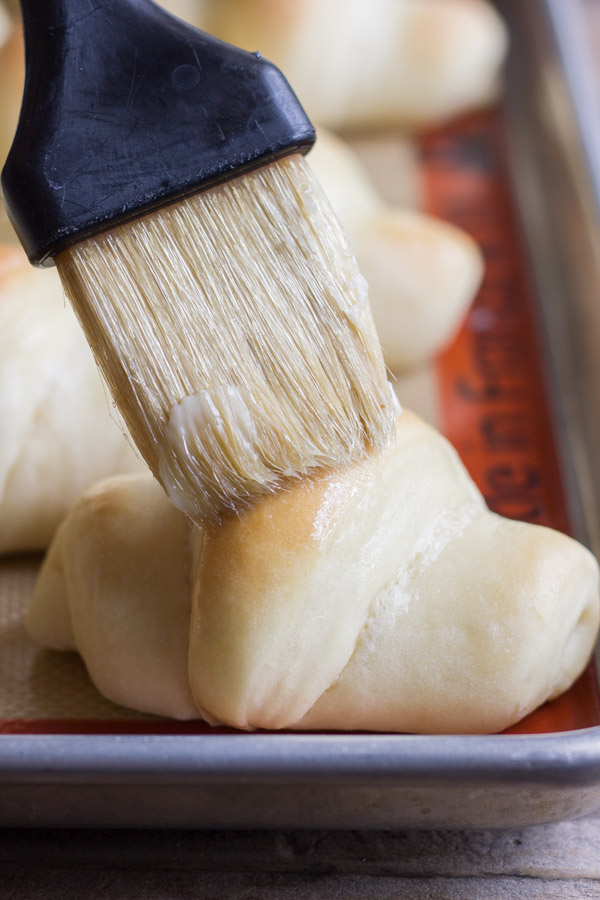
So they will live up to their name, brush each roll with melted butter. True confession: Sometimes I do two coats.
Do sneak and eat one while it’s still warm. They absolutely melt in your mouth.
You will adore these rolls, and your friends and family will beg you to make them again, and again. And you won’t mind at all.
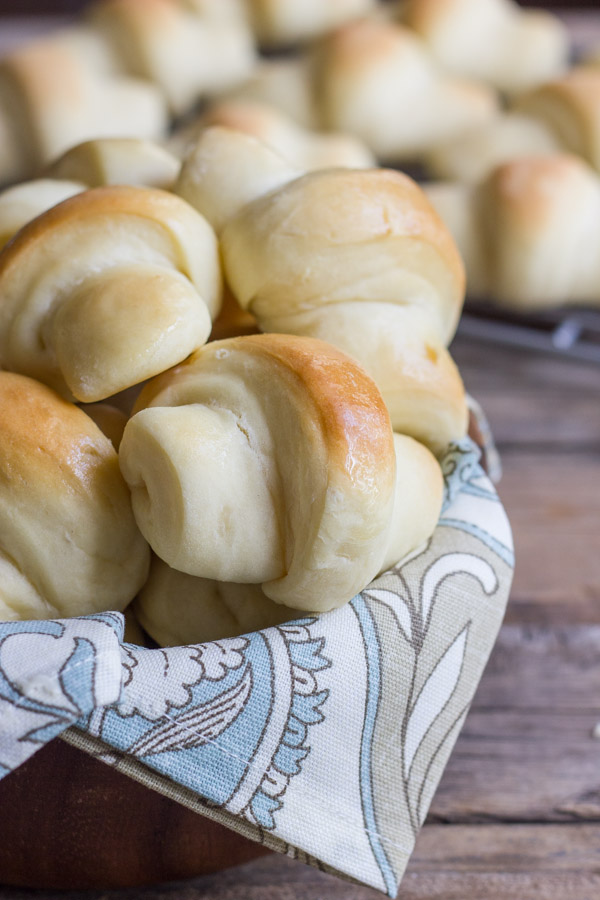
You’ll get so good at making them that you don’t even need to look at the recipe. And everyone will start calling these “Lisa Rolls” or “Betty Rolls” or “Susie Rolls” or whatever your sweet little name is. And you will be a hero!
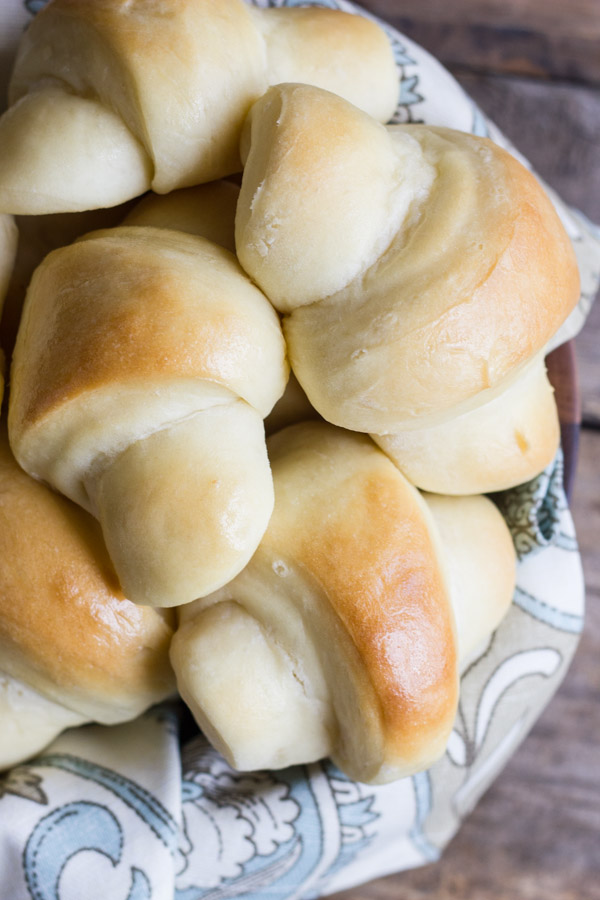
The Best Butterhorn Rolls

These Butterhorn Rolls will absolutely melt in your mouth!
- Prep Time: 20 minutes
- Cook Time: 24 minutes
- Total Time: 44 minutes
- Yield: 2 dozen 1x
- Category: Bread
- Method: Bake
- Cuisine: American
Ingredients
- 1/4 ounce packet (2 1/4 teaspoons) active dry yeast
- 2 tablespoons warm water
- 2 cups warm milk (I use whole)
- 1/2 cup sugar
- 1 egg beaten
- 1 teaspoon salt
- 6 cups flour, divided
- 3/4 cup plus 2 tablespoons butter, melted (will be used separately)
Instructions
- In a large bowl, dissolve the yeast into the warm water. Let the yeast sit and proof for about 3 minutes. Then pour in the milk and stir.
- Add the sugar and egg and mix.
- Add 3 cups of flour and salt, and mix.
- Add 3/4 cup melted (should be warm, not hot) butter and mix, then add 3 more cups of flour mixing well between each one. Sometimes it works best to use clean hands for the final mixing. The dough should still be a bit sticky, but pulling away from the side of the bowl. If you need to add an additional 1/4 or 1/2 cup of flour, that is okay.
- Pour the dough out onto a large piece of plastic wrap.* Wrap well and then place into a gallon size Zip-loc bag (do not remove all the air) and refrigerate for at least 5 hours or overnight.
- Remove dough from plastic wrap and punch it down.
- Divide the dough into two equal parts.
- Roll each part out one at a time into a 12 inch circle on a well floured surface. Sprinkle additional flour over the top of the dough.
- Using a pizza slicer, cut the dough into four quarters, and then each quarter into three wedges**
- Starting at the wide end, roll them up. Place the rolls on a greased or Silpat lined baking sheet. I usually do two baking sheets with 12 rolls each.
- Cover the rolls with a clean dishcloth and let them rise for one hour.
- Preheat oven to 350 degrees.
- Bake for 12-15 minutes, or until the tops are golden brown.
- Remove to a cooling rack and brush with remaining 2 tablespoons of melted butter.
Notes
Slightly adapted from Taste of Home. *You may find it easier to just put the dough in a large, greased bowl covered with plastic wrap when refrigerating. If it rises enough, it can burst through the plastic wrap. ** If you would like to make 32 smaller rolls instead of 24 larger, cut each circle of dough into 16 triangles, and watch the rolls closely in the oven. They may need 1-2 less minutes to bake.
Nutrition
- Serving Size: 1 Roll
- Calories: 204
- Sugar: 4.3g
- Sodium: 156mg
- Fat: 7.6g
- Saturated Fat: 4.6g
- Unsaturated Fat: 2.4g
- Trans Fat: 0.3g
- Carbohydrates: 29g
- Fiber: 0.9g
- Protein: 4.4g
- Cholesterol: 27mg

These look so fluffy and warm…pinned!
Thanks for the pin Chloe!
Love these rolls, perfect for any breakfast or snack:)
Does wrapping in plastic wrap make for a better rise than in a bowl? Or is it just so it doesn’t burst out of a bowl?
Good question, I have found that when I don’t wrap in plastic wrap before placing the dough into the ziplock bags, there are dry spots on the outside of the dough that don’t really mix back in very well when I’m rolling the dough out later. It seems like overkill, but it’s just what I’ve always done and seems to work the best!
These butterhorn rolls look right up my street- so buttery and delicious! Definitely recipe to try out!
Thanks Jess – Hope you do get to try them!
Mine will be Lacey Rolls.
Haha! Sounds good Lacey. Hope you get a chance to try them!
you can make these into a dessert or holiday snack by brushing lightly with butter, sprinkle with cinnamon sugar mix before rolling up and whipping up a basic glaze or frosting to drizzle on top after theyre baked. we have a family recipe for butterhorns that are a sweeter dough base but both are delicious!
Kelly, that sounds amazing! I’m definitely going to try that!!!
Can these be frozen once baked or frozen pre baked?
I have tried freezing them before I baked them, and I didn’t love the result. They just didn’t quite rise right. I have also frozen them after baking, and they do okay. Not quite as good as baked the same day though! Thanks for your question Jolie!
Thank you for sharing! I’m making these tonight for ‘Friendsgiving’ tomorrow afternoon! I hope you don’t mind I may share them next week in a recipe round up! Hopefully I make them well!
xo Rachel
That would be great, thanks Rachel. Hope everyone just loves them!
Julie – these are fantastic! My dough exploded in the fridge overnight so I was worried at first but they came out perfectly. I was fighting people away from them so they wouldn’t be gobbled up before dinner was served. 🙂 Thanks again!
xo Rachel
So glad everyone loved them Rachel!
My mother got this recipe from Mrs. (Judge) Gass in Carterville Mo in 1930. Needless to say, all of the family make them and love them. Mother wrote out the recipe in an old Rumsford Cooking Book…. Only difference is ,the recipe called for 3 eggs and 4 cups of flour. And the Fleishman’s cake yeast. I’m making some now!!.
So interesting! I love hearing about the beloved recipes passed down within families. I’m making them now too. Happy Thanksgiving to you!
Hice estos ricos panes y fueron un éxito ! Gracias por la receta!
You are so welcome Paty!
I have made these a few times and they are now a holiday favorite! Right now I’m trying the recipe as a pizza dough with minced garlic added to the recipe.
The dough is very versatile – you can also use it to make cinnamon rolls. Hope you enjoy the pizza!
Is there a limit to how long the dough can be left in the fridge before rolling?
The longest I’ve left the dough in the fridge is 18 hours. Hope you enjoy.
Help! I was really looking forward to these for Easter. My dough came out of refrigerator the same size it was when I put I it in and hard as a rock :-(. Any ideas? I’m so bummed!!
I’m so sorry Lisa, it sounds like your yeast did not activate for some reason. I wish I could be there in the kitchen with you to help troubleshoot. The most common reasons for this would be that the yeast was too old, or the temperature of the ingredients (water, butter, milk) were not hot enough to activate it, or too hot and killed it. Once again, I’m so sorry for your frustration!
I made this last night and refrigerated it but it did not rise at all. I have made this before and it turned out perfect so not sure what to do. Can I do anything with this dough or just throw it out?
Hi Joanne, that has happened to me once or twice in all the times I have made these rolls. I wish I knew why, but my best guess is that it has to do with the age of the yeast, or the temperature at which the ingredients (like water, milk, and butter) were added. I have not had very good luck with the end product when the dough did not rise at all, but you may want to just try and see. I hate to see it go to waste. So sorry this happened to you!
We already have a version of these in my family called “Loretta Rolls” after my aunt! 🙂 I’m excited to try this recipe and see how they match up, maybe I can turn them into “Erin Rolls”
Hope you enjoyed Erin!
Wasn’t thinking clearly when I started putting together the rolls for sitting an hour that I don’t need them til the next day. Do you think I can leave as is with the towel on the baking sheet in the fridge over night?
April, I haven’t tried letting them rise and then refrigerating before baking. I might not have answered your question in time, but one thing you could do is bake them today, and then just let them cool completely, put them in an airtight container and then just rewarm them for a few minutes right before serving. Let me know how they turn out for you!
I want to use these to make bundles with sausage and cream cheese in the middle. Is it essential to let them rise after you cut them? I’m worried to put in the filling and then just let it sit on the counter before baking.
Hmm… I’ve never tried not letting them rise before baking. I’m worried they may be a little dense without that step.
Thank you so much for responding. I woke up this morning, and the dough looks PERFECT! I’m so excited. I live abroad and only have a tiny oven, which can maybe fit 6 of these at a time, possibly 8. I guess I’ll make the sausage mixture, let them rise, and then cook them in batches. Do you think it’s ok, after I get one batch in the oven, to stick the others in the fridge until they’re ready to go in?
Thanks!
Sorry if this is too late but that should be fine! Enjoy Sarah!
Why do you have to refrigerate the dough to let it rise? Is there a reason you can’t let it rise at room temp?
Debbie, I wish I knew more about the science behind working with yeast but, yes, I do believe it would be fine to let the dough do a “first rise” at room temp (until double in size) and then shape the rolls and let them rise again before baking. Thanks for your question.
Julie,
I found your blog while I was searching for a brownie recipe. The brownie recipe is a keeper. Next, I tried the “Coconut Oil Honey Almond Granola.” I have shared the granola recipe with three others (so far). My family really enjoyed the granola. It was easy to make and so good. Next . . . . I made “The Best Butterhorn Rolls.” I have made four batches of them in the last few days. Twice for my own family and two batches for company. 🙂 I had the sweetest compliment that I wanted to share with you . . . “the rolls were out of control tasty!!!” What do you think about that!!!? Thank you so very much for investing your time and sharing your delicious recipes!
You have completely made my day with your sweet comment! Thank you so much and I’m so glad the recipes have worked out well for you.
Dear Julie,
Thank you for sharing your recipes! These look delicious. I only have one question.
Do they taste sweet?
I’m thinking of rolling in some ham & cheese, should I reduce the sugar in this case?
Thanks for your time!
That sounds great San. I think they are very mildly sweet, but you could cut the sugar in half if you like. Hope you enjoy!
Can i refrigerate the dough for up to 24 hours before shaping and baking or will the dough go bad?
Adriana, yes that should be fine. Enjoy!
This is amazing!!! I made it this Thanksgiving and everybody loved it! The best recipe I have ever tried! Thank you!
Pamela, I’m so happy to hear that they were a hit! May you enjoy making them for years to come!
can you freeze these after these after they are baked or would they lose their taste ?
Theresa, I haven’t tried freezing these, but I don’t see why you couldn’t. Sorry just replying to your question now. Hope you enjoy!
I made your rolls for Christmas Eve dinner and they were a huge hit! Thank you!
I only used half of the dough and then used the remaining half the next day, for pigs-in-blankets. The first batch resulted in HUGE rolls and I needed to bake them a few minutes longer. I divided the second batch into 24 small rolls and liked them even more that way. From now on, I will divide into 4 dozen, instead of 2 dozen as recommended. This will be our favorite for years to come. Thanks again!
That’s wonderful Tatyana… I make them smaller too sometimes. Glad you were able to adapt the recipe to your liking.
I made these for Thanksgiving today and they were amazing!! Thank you!!
I brushed melted butter on one side of the dough disks after rolling out, prior to cutting and rolling into cresents.
GREAT!!!
Wonderful idea Cynetta! Glad you enjoyed.
If I use only half the dough after refrigerating overnight, could I punch down the the remaining dough and refrigerate it again to use the following day or two?…or would it be better to make only half the recipe?
Hi! You could definitely try using some dough, and then using the rest a few days later. But I can’t say for sure because I haven’t tried it. Let me know how it goes if you try it.
What do you think about using these for pigs in a blanket? Would it work?
I think that would be soo good! It is a slightly sweet dough. Let me know what you think if you try it!
I definitley will…these rolls are amazing…thank you for sharing!!!
Thank you, Elaine!
I have been making homemade butterhorns every year for Thanksgiving for the last 12 years. I stumbled upon this recipe 3 years ago and have never looked back! Everyone in my family devours them – these rolls are so buttery and flaky! But I especially like how easy they are to make compared to most recipes. Thanks for posting!
I’m so glad you all love them too! Happy Thanksgiving, Kate!
Just made these, as this is the closest thing I found to the “horn” my Norwegian grandmother makes (and because I really liked your website!).
I brushed with egg instead of butter, just because that’s what she does 🙂 Works great!
Report: They are amazing! Mouth-watering and look just like in the picture! Just like gramma used to make!!!
These were turned out to be fantastic. Definitely my go-to recipe from now on.
These rolls are super delicious and turn out giant! Just a heads up to anyone wanting to make these that you may have to “burp” your bag in the refrigerator a few times so it doesn’t burst on you!
Thanks so much for posting this delicious recipe! It will be well used at our house (:
Hi there!
These rolls have definitely become my go to for any special meal. Have you ever tried freezing the dough to use for a later date? I was making them for an event and made way too much dough. I don’t need them right now so I’d love to save the dough for later.
I did try freezing the dough (shaped) and they did not rise well. I would recommend using up the remaining dough to bake them into rolls, then freeze the baked rolls. When you are ready to serve them, heat them back up in the oven for a short time covered with foil.