Description
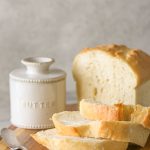
My very favorite Sourdough Sandwich Loaves with an easy to follow, step-by-step tutorial and all my best tips and tricks for homemade bread!
Ingredients
Scale
- 400 grams lukewarm water
- 225 grams active bubbly sourdough starter
- 40 grams oil (I use olive or avocado)
- 750 grams bread flour
- 15 grams salt
- 8 grams dry malt powder
Instructions
- Use a kitchen scale to measure 400 grams of water into a large bowl. Add 225 grams of active bubbly starter to the water (it should float on the water) and whisk together.
- Add 40 grams oil, 750 grams bread flour, 15 grams salt, and 8 grams malt powder. Whisk together until a shaggy dough forms.
- Scrape down the sides of the bowl, and then cover and place in the oven with the light on, or the bread proof setting for 30 minutes.
- Uncover the dough, and do a series of “stretch and folds”, pulling one edge of the dough as high as it will go, and then folding it over the top of the dough and tucking it under. Stretch and fold each “quadrant” of the dough in the bowl, and then cover and return to a warm place. Repeat the “stretch and fold” process two more times, allowing the dough to rest an hour in between each “stretch and fold”.
- After the third “stretch and fold”, let the dough proof for 4-12 hours, covered, in a warm place.
- Scrape the dough out of the bowl and pour it onto a floured work surface. Divide it evenly into two parts (750 grams each).
- Press the dough sections into a rectangle shape (don’t use a rolling pin), then fold the edges toward the center and roll into a log shape. Transfer the dough to a surface without flour, and tighten the shape of the loaf by pressing the dough against the counter as you pull it toward you. Repeat with the other half of the dough.
- Place the shaped dough into a greased, standard sized loaf pan. Cover and let rise until the dough is about an inch over the top of the loaf pan, about 2-6 hours. Be patient!
- Move the oven rack to the center or lower third so the top of the loaf won’t brown too much, and then preheat the oven to 375 degrees.
- Dust the top of the bread loaves gently with a bit of flour, and then slash the top with a bread lame about 1/2 inch deep.
- Bake the loaves at 375 degrees for 30-33 minutes. Let them cool in the pan for 5 minutes, brush the tops with butter, and then turn them out onto a cooling rack.
- Allow the bread to cool completely before slicing with a serrated knife. We find it is easier to cut when the loaf is turned onto its side.
- Depending on the humidity in your climate, this bread will stay fresh for 2-3 days. It can be sliced, frozen, and then toasted with delicious results! You can also freeze a whole loaf, cooled completely, and wrapped airtight, for up to 3 months.
Nutrition
- Serving Size: 1 Slice
- Calories: 145
- Sugar: 0.3g
- Sodium: 244mg
- Fat: 2.3g
- Saturated Fat: 0.3g
- Unsaturated Fat: 1.7g
- Trans Fat: 0g
- Carbohydrates: 26g
- Fiber: 1.1g
- Protein: 4.3g
- Cholesterol: 0mg

